Makewright adds guided configuration, server-verified pricing, Shopify checkout, and a workshop quote workflow to made-to-order products. Use this guide to launch your first product and operate it with confidence.
Quick start
Launch one complete product before adding the rest of your catalog. New to made-to-order selling? Read the end-to-end workflow guide first.
- 1Create a template
Define the choices a shopper can make.
- 2Add pricing and routing
Decide what can check out and what needs review.
- 3Publish and assign
Connect the template to an active Shopify product.
- 4Install the app block
Add Makewright to the product template in your theme.
- 5Test both paths
Complete one checkout and one workshop quote.
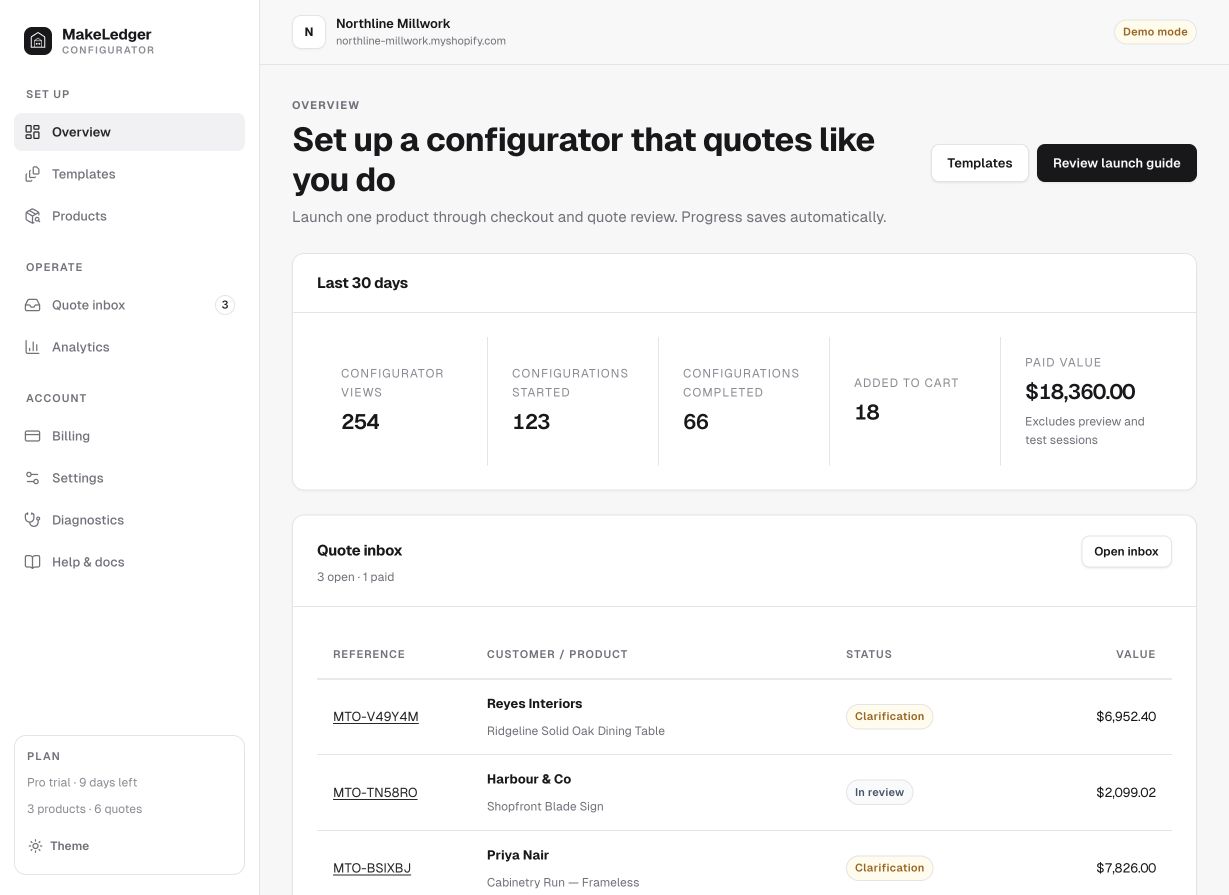
Build a template
A template is the reusable specification behind a configurator. Start from a starter or create one from scratch, then add fields in the same order a customer should answer them.
Single select, multi-select, swatches, and checkboxes.
Numbers and dimension groups with units and limits.
Text, notes, quantities, and customer file uploads.
Show or require fields only when earlier answers make them relevant.
Use plain customer-facing labels. Keep internal keys short and stable because pricing rules and historical configurations refer to them.
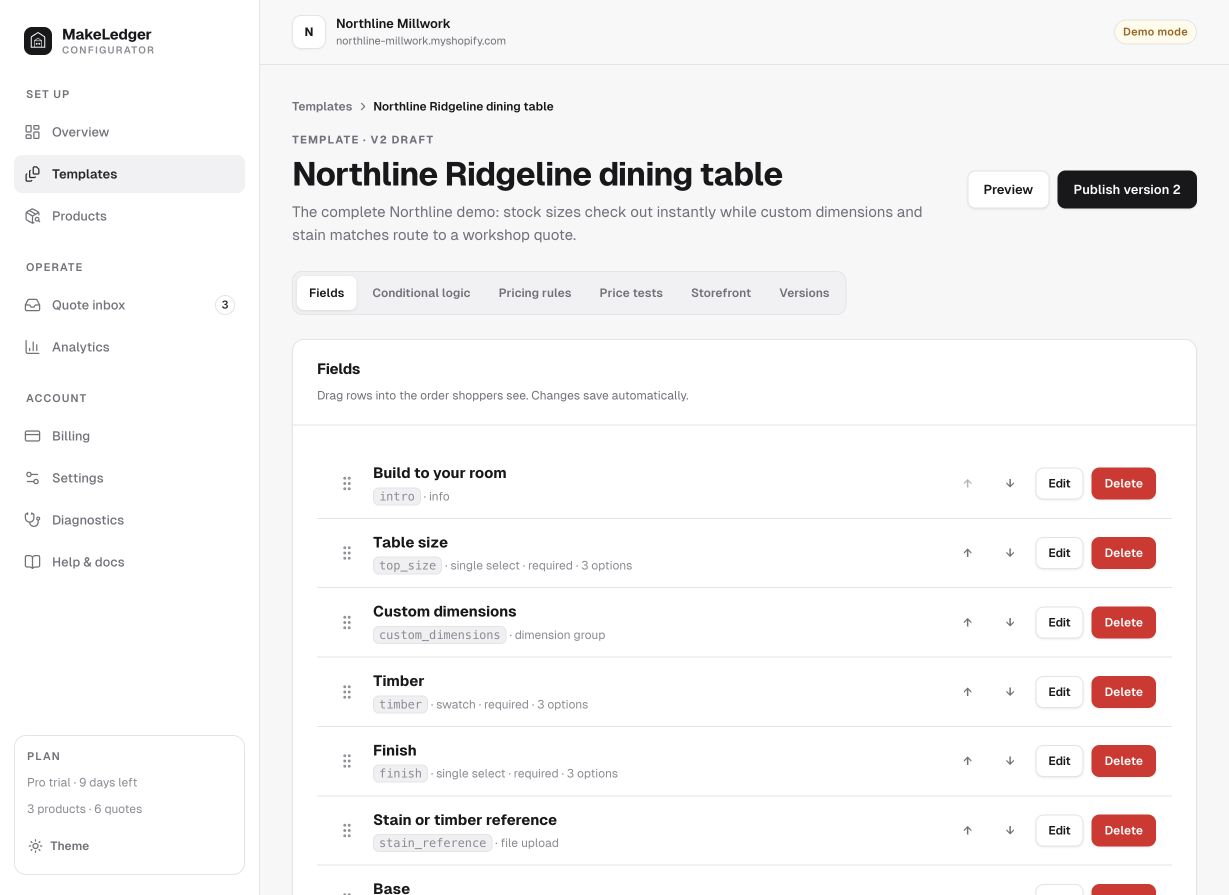
Set pricing and order routing
See a worked dimension-pricing example.
Makewright calculates prices on the server. Use fixed, per-unit, dimensional, tiered, percentage, minimum, or formula rules to match how your shop estimates work.
The configured product is added to the Shopify cart with its selections attached.
The full specification enters the quote inbox for review before a draft order is sent.
A field can force a quote—for example, selecting Custom size or requesting installation. Add price tests for representative combinations before publishing so future edits cannot silently change expected totals or routes.
Publish and assign products
- Run the template’s price tests and resolve any validation errors.
- Publish the draft. Published versions remain immutable for reliable quote history.
- Open Products, select an active Shopify product, and assign the template.
Removing an assignment hides the configurator without deleting its templates, quotes, or history.
Go to Products →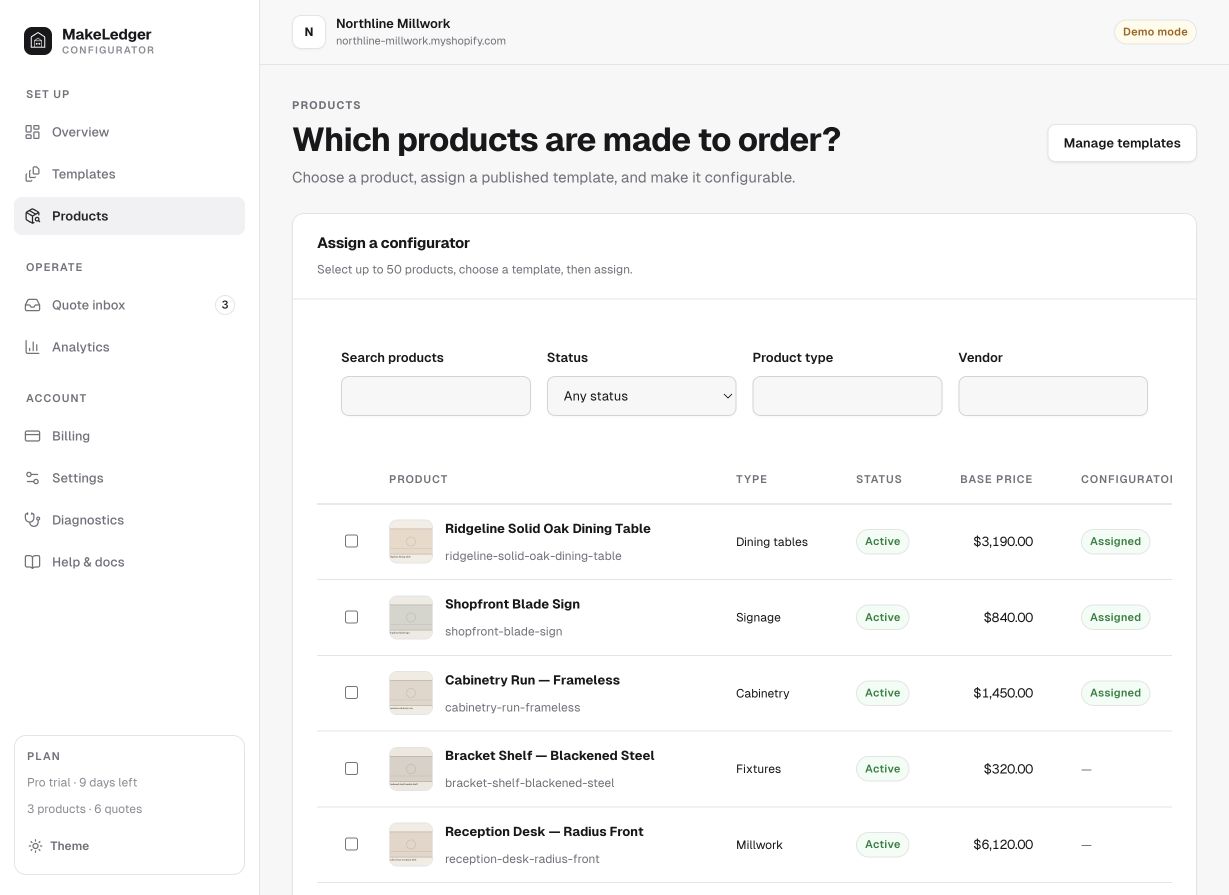
Install it on your storefront
- Open Diagnostics and select your published Online Store 2.0 theme.
- Open the Shopify theme editor from Makewright.
- On the product template, add the Makewright Configurator app block.
- Place it near the product form, save the theme, and open an assigned product.
Makewright does not edit theme files. Legacy Liquid product templates need an Online Store 2.0 JSON template before the app block can be installed.
Manage workshop quotes
Explore the storefront-to-quote workflow before setting up your first product.
Every request keeps the shopper specification, price trace, files, messages, and published rule version together.
- Review the specification and request clarification when needed.
- Adjust commercial terms and approve the quote.
- Create or update the Shopify draft order from the approved quote.
- Send the invoice. Makewright records Shopify payment updates. A deposit payment moves to Deposit paid; full or final balance payment moves to Converted.
Re-approving changed terms updates the existing draft order instead of creating a duplicate.
Open Quote inbox →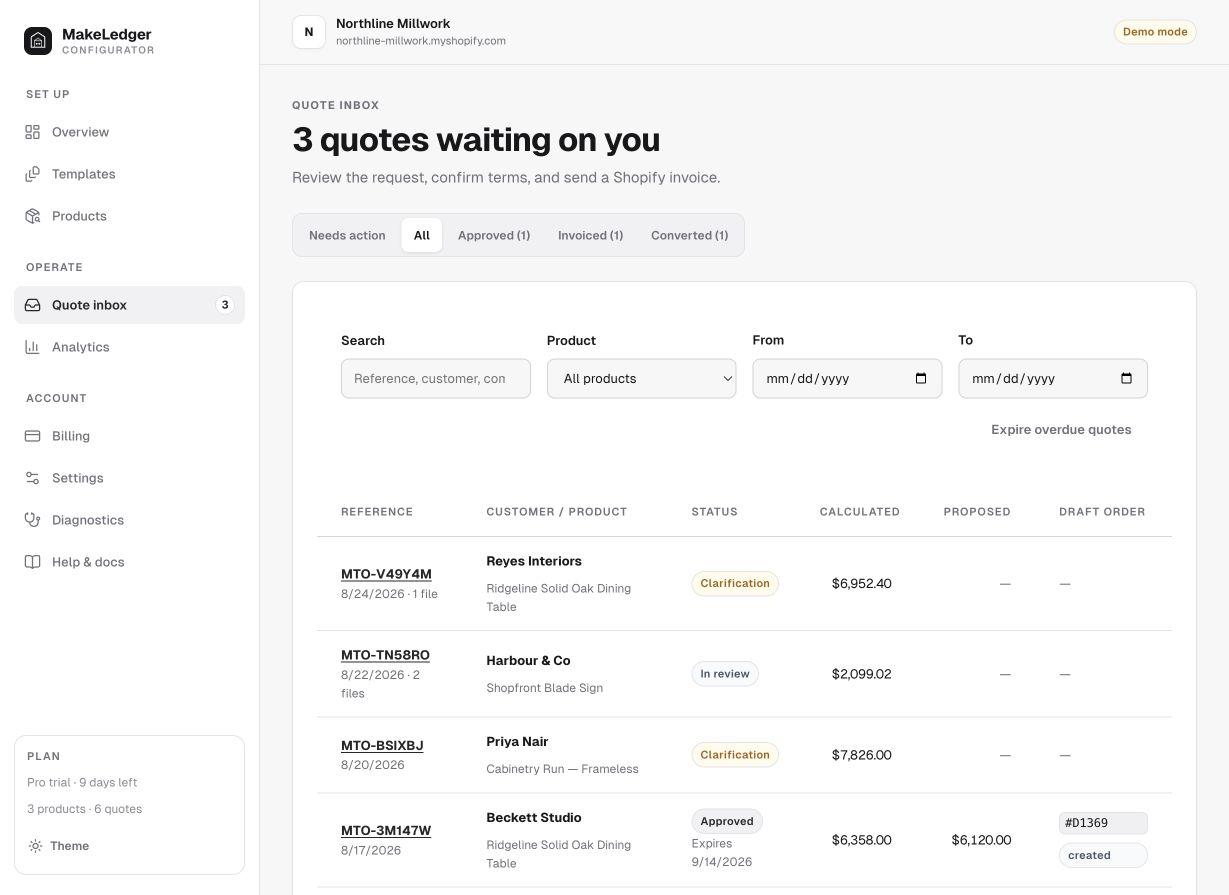
Collect a deposit, then the balance
See a deposit and balance example.
Reviewed September 10, 2026. Deposits require Growth or Pro, including an eligible Growth trial. Starter supports a full-price quote invoice but cannot create deposit or balance-stage draft orders.
- Open a quote, review the specification, and save the agreed total and terms. Set a whole-number deposit from 5% to 90%.
- Approve the quote to create its deposit draft order. Send the Shopify invoice to the customer. Approval creates an invoice; it does not collect payment.
- Wait for Shopify to report the deposit paid. The quote moves to Deposit paid; its deposit percentage can no longer change.
- When ready, choose Create balance order. This requires a paid deposit, the Deposit paid state, an eligible plan, and a positive remaining amount.
- Send the separate balance invoice. The customer pays through Shopify; Makewright does not automatically charge a saved payment method. Shopify’s paid update moves the quote to Converted.
An agreed $2,000 total with a 50% deposit creates a $1,000 deposit invoice. After that payment is recorded, the merchant can create a $1,000 balance invoice. This is an illustrative amount split, not a customer order; Shopify invoice tax and shipping details should be reviewed before sending.
Re-approving unpaid terms updates the existing draft order. Do not treat an emailed invoice, quote approval, or production completion as proof of payment. Use the payment state reported by Shopify.
Print the customer quote and production sheet
Printable customer quotes and production specification sheets are available on Growth and Pro, including an eligible Growth trial. They serve different readers.
Customer quote
Open the customer quote link from the quote detail screen or the shopper confirmation email. Use the browser’s print command to print or save a PDF for sign-off. The document shows the submitted specification and, when approved, the merchant’s agreed price and deposit terms.
Before approval, request-pricing products hide the calculated estimate. Redacted customer quotes and invalid or expired signed links return Not found. Treat the link as private: anyone with a valid link can open the document. Do not put it in public marketing or analytics.
Production specification
From the quote detail screen, open the production spec sheet and print it for the workshop. It includes fulfillment labels, quantities, file references, payment state, notes, and order references. A file reference does not bypass file access checks.
The production link expires after seven days. Open the quote detail again to generate a fresh production link. A production sheet is a handoff document, not an automatic manufacturing instruction or permission to charge a balance.
For a custom table, the sheet can carry the agreed dimensions, timber, finish, quantity, order references, and deposit/balance state. Confirm the approved specification and your own production prerequisites before starting work.
Hide the estimate with request-pricing mode
In Products, enable request-pricing for an assigned product. This is available on every plan. It hides amounts on the storefront and sends every configuration for that product to the quote desk, even when a configuration would otherwise qualify for checkout.
The calculated price remains available to the merchant for review. It stays hidden from the public customer quote until the merchant approves a price. Review the request, save terms, approve, and send the appropriate Shopify invoice.
Test the product as a shopper after changing the setting. Check that no estimate appears and that the submitted quote retains the selected specification.
Test before launch
A normal checkout with real payment details creates a real charge. Use one of these paths intentionally; do not discover the refund flow after the fact.
Option 1: Shopify test order — best for the complete checkout
- In Shopify Admin, open Settings → Payments. Enable Shopify Payments test mode, Shopify’s Test payment gateway, or your provider’s sandbox. Customers cannot make live card purchases while a payment provider is in test mode.
- Open the assigned live product, configure it, add it to cart, and complete checkout using Shopify’s test payment details.
- Confirm the configuration appears on the order, then turn test mode off before reopening the store to customers.
Option 2: quote and draft order — no checkout charge
- Choose a quote-forcing option, or enable request-pricing for the assigned product, and submit a test quote with an inbox you control.
- In Makewright, review and approve it to create the Shopify draft order.
- Inspect the draft’s products, configuration, price, tax, shipping, and invoice. Leave it unpaid; sending an invoice is not proof of payment.
This safely verifies the quote handoff and draft-order data. It does not verify a completed payment webhook. Shopify: draft orders ↗
Option 3: real payment — refund it immediately
- Use only your own payment method and place the smallest practical order.
- In Shopify Admin, open Orders, select the order, and choose Refund.
- Refund the full item and shipping amounts as appropriate, choose whether to restock, and confirm the refund. A refund cannot be reversed.
Shopify notes that payment-processing or transaction fees might not be returned, depending on the provider and store. Shopify: refund an order ↗
Configure a stock option, add it to cart, and confirm selections and price.
Select a quote-forcing option and submit a real test request.
Approve the request, create the draft order, and send its invoice.
Complete test checkout and confirm the quote becomes Converted.
Troubleshooting
The configurator is not visible
Confirm the product has an active assignment, its template is published, and the app block is saved on the product’s current theme template.
A configuration takes the wrong path
Review force-quote fields and conditional rules, then add a price test that covers the exact combination.
A quote email did not arrive
Check the merchant notification address in Settings, then review the email provider result in Diagnostics.
A draft order did not update
Open the quote timeline for the Shopify response. Re-approve the latest terms before retrying the draft order.
Still stuck? Run Diagnostics, then email ggray225@gmail.com with your store domain, product, template, and quote reference.